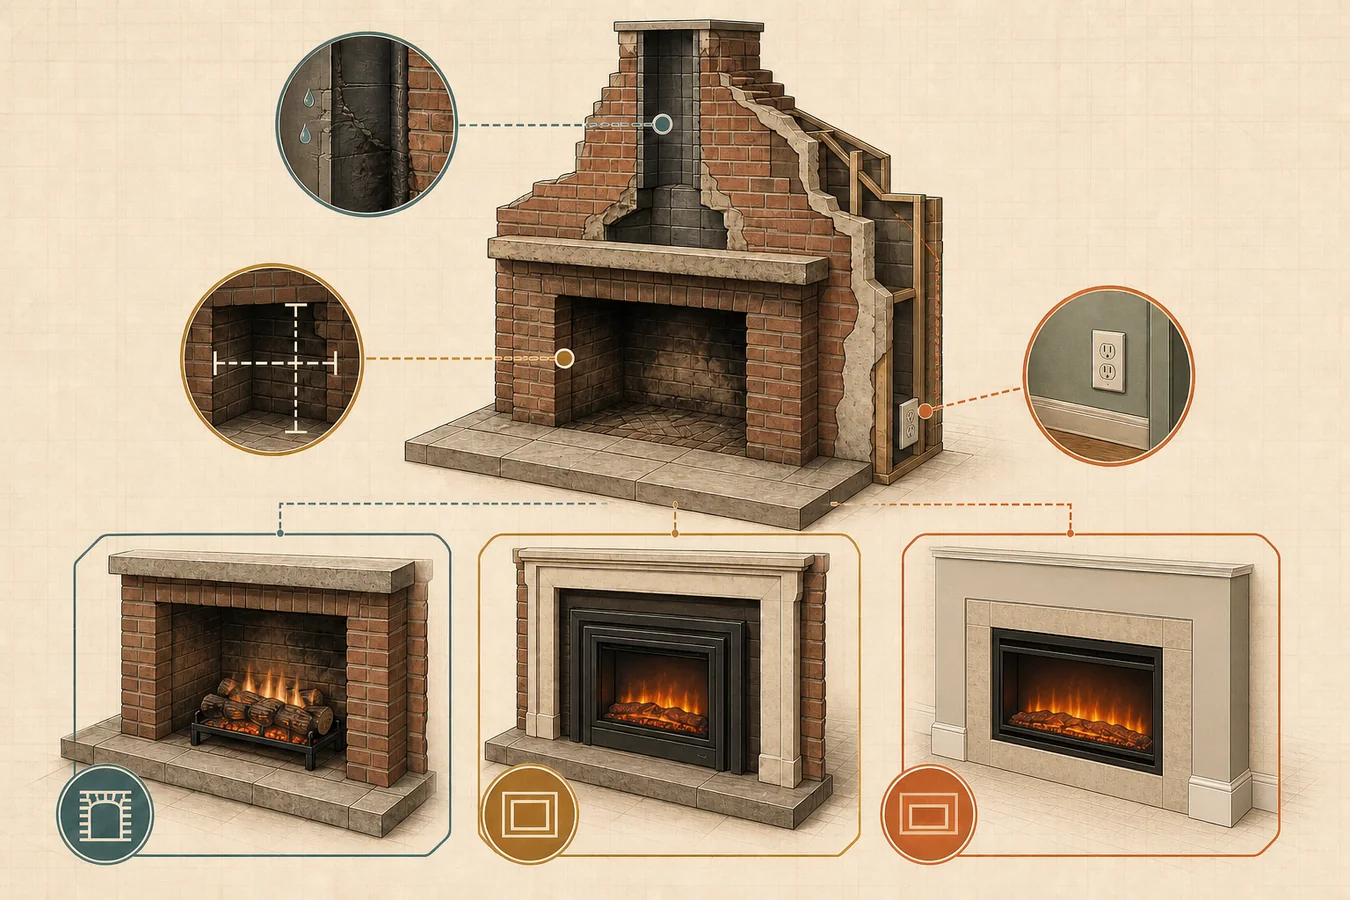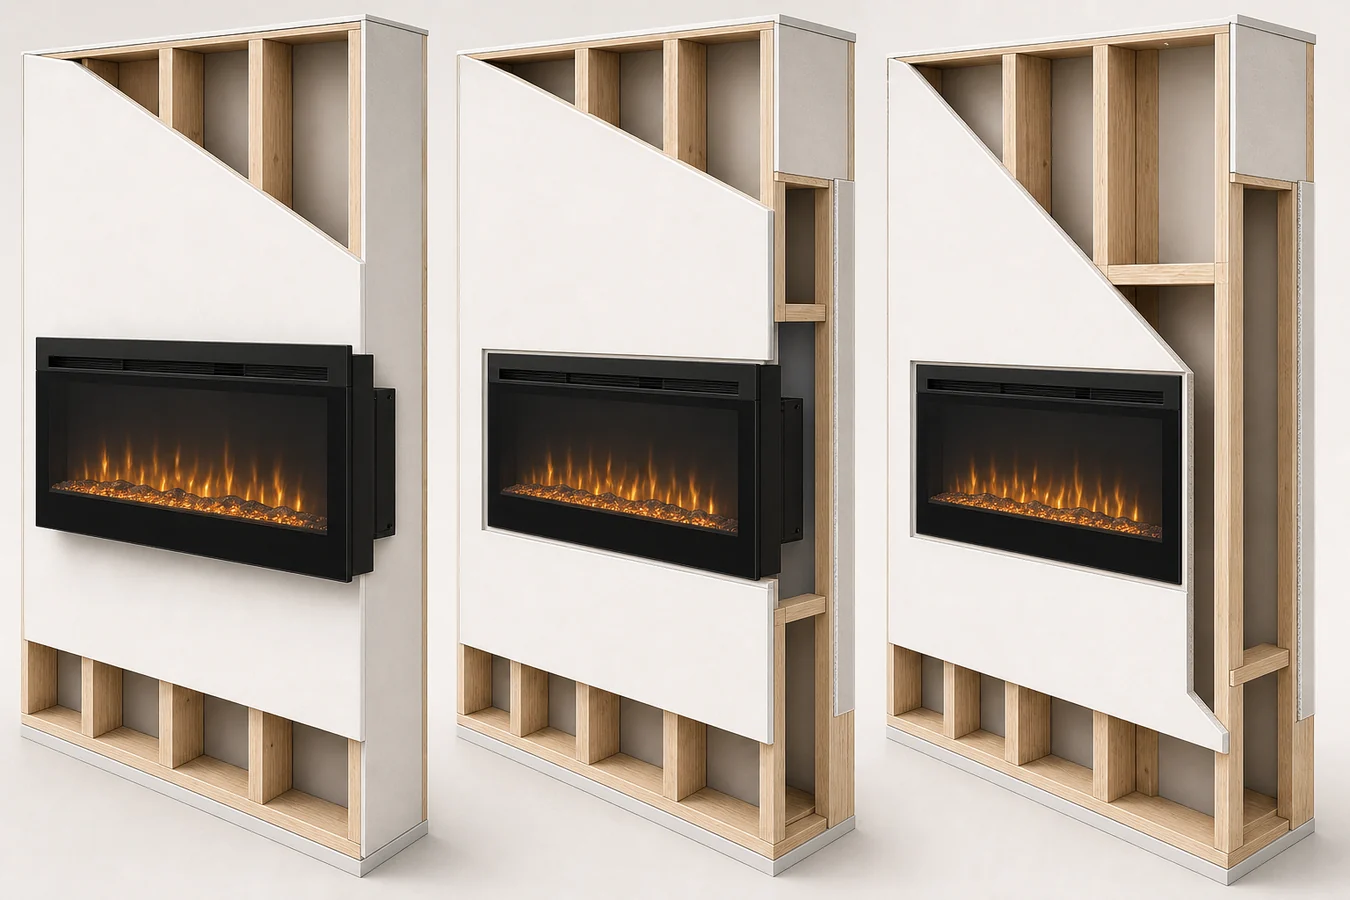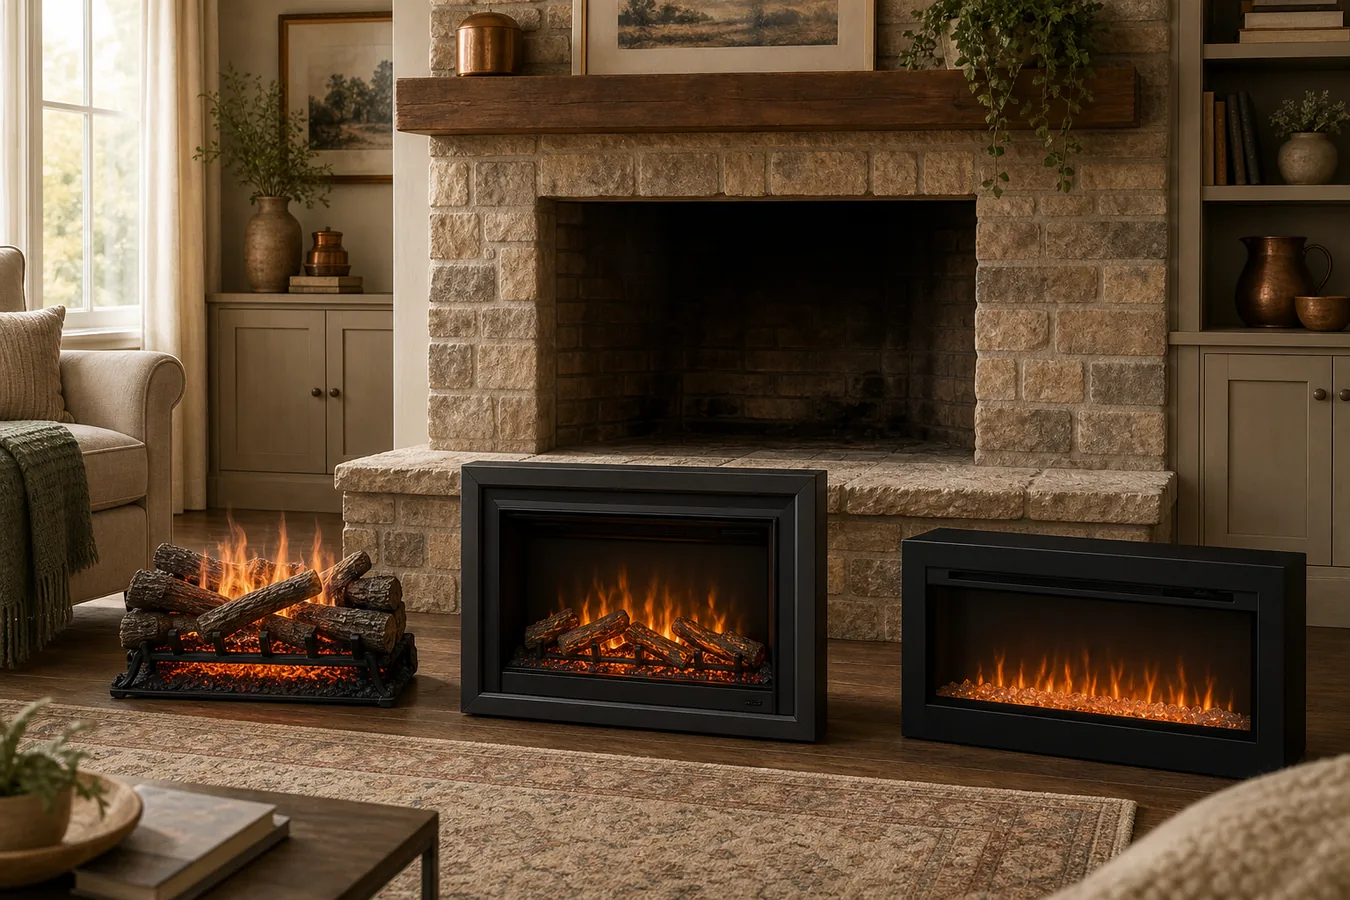
Open three shopping pages for electric fireplace inserts and you may be looking at three different projects. One product is an open log set that sits on the old firebox floor. Another is a complete firebox that slides into the opening and uses trim to hide the gap. A third is a built-in unit intended for a framed wall, even though its dimensions look as if it might fit the hearth.
Choose the format before you compare models. If you want to keep the masonry interior visible, start with a log set. If you want the old firebox to disappear behind a finished face, start with a retrofit firebox and its compatible surround. Treat a built-in or recessed model as a candidate only when its current manual explicitly allows the existing-fireplace installation you plan to use.
That first choice removes far more bad options than a product ranking. It also tells you which measurements, site conditions and manual sections matter next.
The word “insert” hides three different projects
Retailers use insert loosely. Do not let the label decide the project for you. Start with what you want to remain visible and how much change you are prepared to make around the old opening.
| Format | What remains visible | Best starting point when… | Easy mistake |
|---|---|---|---|
| Electric log set | Most of the existing masonry firebox | You like the old hearth and want the least enclosure work | Assuming “open” means there are no cavity, airflow or power requirements |
| Retrofit firebox | The fireplace face around a complete appliance and surround | You want to hide the old firebox and create a finished rectangular face | Checking body fit but not whether the approved trim covers the old opening |
| Built-in or recessed firebox | A finished wall or enclosure around the appliance | You are willing to rebuild the opening and the exact manual supports that assembly | Assuming a unit made for framed construction becomes a retrofit insert because it fits dimensionally |
“Plug-in” and “hardwired” do not create a fourth format. They describe the power connection. Two similar-looking fireboxes can have different approved power and installation methods, so settle the physical format first and then read the current manual for one exact model.
Decide what the finished fireplace should cover
An existing fireplace gives you three separate limits:
- The usable cavity is the real space available after tapers, ledges, dampers, outlets and uneven masonry are accounted for.
- The body or required opening comes from the exact model drawing for the installation method you intend to use.
- The finished coverage is the part of the old opening hidden by the face or an approved surround.
A firebox can enter the cavity and still leave an awkward strip of soot-stained brick visible. A wide surround can cover the front opening while the appliance body binds farther back. Treat fit and finish as two answers, not one.
SimpliFire’s electric-insert brochure makes the split unusually clear: it lists front width, rear width, height and depth for the appliance, then asks the buyer to select a separate three- or four-sided surround to fill the gap around the old opening. See the SimpliFire insert and surround dimensions. Those series dimensions are reference material, not a substitute for the current manual of a model you are buying.
If your opening is not square, record the narrow points before you shortlist anything. The electric fireplace insert size guide shows how to measure the front and rear, separate body size from trim coverage, and keep the exact labels attached to each number.
Run the existing-fireplace reality check
The opening can be large enough and the project can still be wrong. Check these five conditions while the fireplace is empty and before a product reaches the cart.
1. Is any old fuel system still in service?
A former wood-burning cavity and an active gas appliance are not the same starting point. If a gas log set, gas line, switch, valve or other fuel component is still in service—or you cannot tell what has been decommissioned—stop treating the job as a cosmetic swap. A qualified professional needs to make the original system safe. Napoleon’s conversion guide likewise treats gas work as professional rather than a DIY step. Compare the manufacturer’s electric and gas conversion paths.
2. Is the cavity dry and protected from the chimney?
Look for water marks, damp masonry, loose debris and signs that rain or drafts still enter through the flue. This is not background housekeeping. The Touchstone Fireplug PRO retrofit instructions tell owners to check the existing flue for leaks because moisture can stop that appliance from operating. The Napoleon Woodland log-set manual tells installers to block chimney drafts with noncombustible material and cap the flue against rain. The corrective method belongs to the chimney and product instructions; the shopping decision is simpler: do not place an electric appliance into an unresolved wet opening.
3. Will an old door or screen block the appliance?
Do not assume an existing glass door can stay closed in front of a heater. On the Woodland log set, Napoleon warns against doors that close or seal off the unit and requires adequate airflow through any retained screen. A different model may route air elsewhere, but the check remains useful: identify the intake and heat outlet on the exact drawing, then see what the old fireplace hardware would cover.
4. Does the exact power path work without improvising?
“There is an outlet nearby” is not the same as meeting a model’s electrical instructions. The Woodland example calls for a dedicated 15-amp circuit and forbids an extension cord. The Fireplug PRO manual specifies a grounded 110-volt, 15-amp outlet, says not to share the circuit with other appliances, and also prohibits extension cords and relocatable power taps. Those are model-family examples, not a universal wiring plan. Save the exact manual and have the circuit or concealed outlet work handled to the applicable instructions and local requirements.
5. Can the unit reach its final position and remain serviceable?
Check the route across the hearth, not just the resting cavity. A projecting lintel, raised lip, fixed screen frame or tight corner can stop a deep box before it reaches the wider space behind it. After it is in place, the heat outlet, controls, glass-removal path and any required fastening points still need to work. If the manual describes framing studs or a finished wall enclosure but never describes existing-fireplace retrofit, dimensions alone do not grant permission to change the installation method.
Read the retrofit section, not just the dimension table
Two official manuals show why the format decision comes first. The numbers below were checked on July 24, 2026 and belong only to the named products.
| Manual example | What the existing fireplace receives | One stated fit example | Other checks in the same manual |
|---|---|---|---|
| Napoleon Woodland NEFI24H log set | An open log set inside the old cavity | Minimum cavity 24 W × 15 H × 14 D in. | 120V/15A supply, chimney rain and debris, door or screen airflow, unobstructed intake and exhaust |
| Touchstone Fireplug PRO 80070 | A complete firebox under a named Existing In-Fireplace Installation procedure | Rough opening 22 3/4 W × 18 1/2 H × 8 D in. | Flue leaks and moisture, optional trim coverage, leveling, grounded 110V/15A outlet and no extension cord |
Read the current Napoleon Woodland manual or Touchstone Fireplug PRO manual for the complete instructions. The useful lesson is not that one set of numbers is better. It is that a log set and a retrofit firebox solve different projects and bring different checks with them.
Choose the least complicated format that still gives the finish you want
Keep the masonry interior visible
Start with an electric log set when the old firebox is attractive, the opening itself is the visual frame and you want minimal enclosure work. Your shortlist still needs to satisfy the log set’s cavity, airflow, moisture and power instructions. This is the simpler format, not a no-requirements format.
Hide the old firebox behind a finished face
Start with a model whose manual includes an existing-fireplace or retrofit procedure and whose approved surround can cover your finished opening. Screen body fit and surround coverage separately. Once you have the smallest body envelope for a candidate, the electric fireplace fit checker can flag an obvious width, height or depth mismatch. It does not approve the electrical, airflow, fastening or construction details.
Rebuild the opening—or stop
A built-in unit can be the right choice when you are intentionally creating the enclosure described in its manual. It is not the shortcut choice for an old hearth. Stop the purchase if the manual never supports the planned retrofit, an old fuel system has not been dealt with, the cavity is wet, the power path is unresolved, or the approved face cannot finish the opening. Change the format or get the site condition resolved before choosing a model.
Build a purchase file that someone else can verify
Before asking a manufacturer or installer to confirm the plan, put these items in one folder:
- straight-on and angled photos of the empty fireplace, including the hearth, rear wall, damper area and any outlet;
- front and rear widths, left and right heights, usable depth and every obstruction that narrows the insertion path;
- the exact model number—not just the series name—and the current product drawing and manual;
- a separate answer for body fit, approved surround coverage, power connection, intake and heat outlet;
- the unresolved question you need the manufacturer, electrician, chimney professional or installer to answer.
That file turns “Will this insert fit?” into a question another person can check. If you still need the measurement record, return to the Fit & Size guides; if the record is complete, compare one exact model at a time instead of reopening the whole product category.